I Tried n8n Automation for the First Time — Wow
Your gateway to effortless workflows
5 min readNagaraj

Get your first workflow up and running with the help of this step-by-step n8n tutorial for beginners — triggering on schedule, getting data, sending notifications. A practical demo with screenshots for an effortless automation in 2026.
Automation is supposed to be a smoother way out, not a tougher task.
I used to go through that hassle — manually transferring data from one application to another, dealing with spreadsheets and emails while time was continuously winning. Automation was another skill that I would never completely learn. However, n8n has altered the picture. The node-based canvas of n8n allowed me to coalesce disparate tasks into a workflow that executed on its own, silently returning to me the hours that I had thought were lost forever.
Overnight genius it was not. It was the one simple workflow — and seeing it work — that turned on the light.
If you are currently caught up in the same loop, let’s eliminate it. Join me in opening n8n, and I will guide you through your first workflow — the very moment when automation stopped being scary and began to be a piece of cake.

📦 What’s Inside
- ☁️ Setting Up the n8n Cloud
- 📥 First Nodes Addition
- 🔌Flow Connection and Testing
- ⏱️ Scheduling workflow
- 👁️Monitoring and Verifying
☁️ Setting Up the n8n Cloud
n8n Cloud is the quickest way to experience it — no installation required, just register at n8n.io and you are in the editor.
For self-hosting the solution, Docker is an option, but using the cloud allows you to concentrate on development.
As soon as you sign in, the canvas greets you — empty and prepared. Click on “Create new workflow” or the plus icon.
The dashboard presents you with templates, however we will create a workflow from the ground up to get a real feel for it.
🔸 The free tier is quite generous — there is a lot to learn.
🔸 The editor is user-friendly — nodes can be dragged and lines connected.
🔸 The community nodes give opportunity for more options in the future.
You can begin your work in the cloud and no longer worry about it.
📥 First Nodes Addition
Nodes work as the foundation triggers ignite the process actions carry it out and tools make the changes.
With my demo: A periodic trigger retrieves Hacker News pieces about “automation,” ranks them and transfers the first 10 to either email or Slack.
Begin with Schedule Trigger: Look for “schedule,” move it to the canvas by dragging it.
Daily scheduled: Intervals “Days,” 1.
Scdule trigger node added
Then, HTTP Request for Hacker News API: Query “http request,” connect from triggering event.
API URL: https://hn.algolia.com/api/v1/search?query=automation&hitsPerPage=10

Http request node added for getting api response
🔸triggers it — no human intervention needed.
🔸Web request brings current data — always brand new.
🔸Join all the points — delivery of the data is done automatically.
Move the nodes, and the magic happens.
🔌Flow Connection and Testing
HTTP input — line snaps Connect trigger output to .
Add Code node for cleanup: Search “Code,” and connect.
Code used :
const hits = $input.first().json.hits;

return hits.map(hit => ({
  json: {
    title: hit.title,
    url: hit.url
  }
}));
Only title and url fields will be kept.
Execute workflow button runs it — output panel displays data.
Next, I Created the Template using JavaScript Code.

Note : If you dont know javascript or python , just use Set(Edit) note to manually map.
🔸Step HTTP: Add another sample and edit test step parameter(s) live.
🔸Connect JSON to easily inspect the output.
🔸Errors will be highlighted with the color red and can be quickly fixed.
Applications intended for running only one node separately from a full execution test could be used in partial runs as well.
⏱️ Scheduling workflow
Return to the Schedule Trigger: Configure a time, for instance, 9 AM on working days.

Insert Email or Slack node for notifications: Link from Set up, and set the credentials.
Message: {{ $json.emailBody}}

My Email Output :
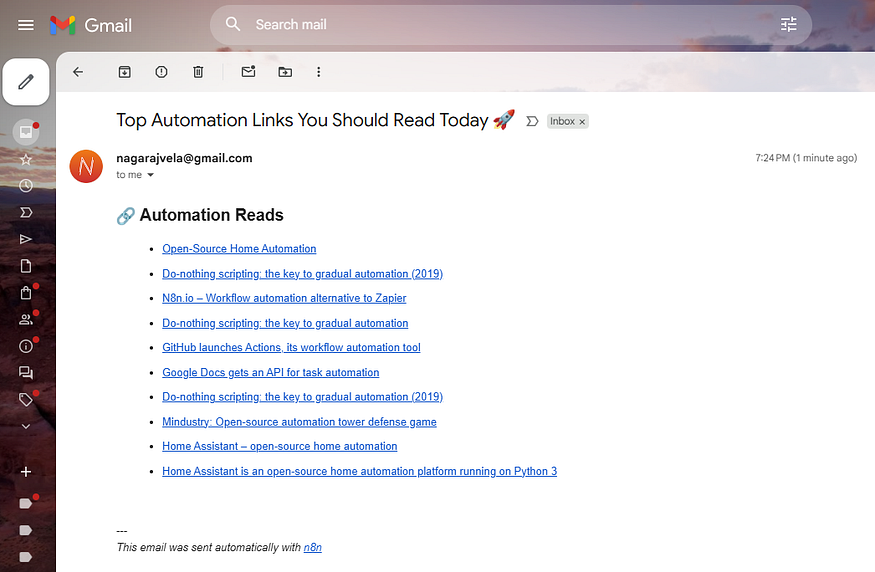
Automatic Email Ourput from n8n
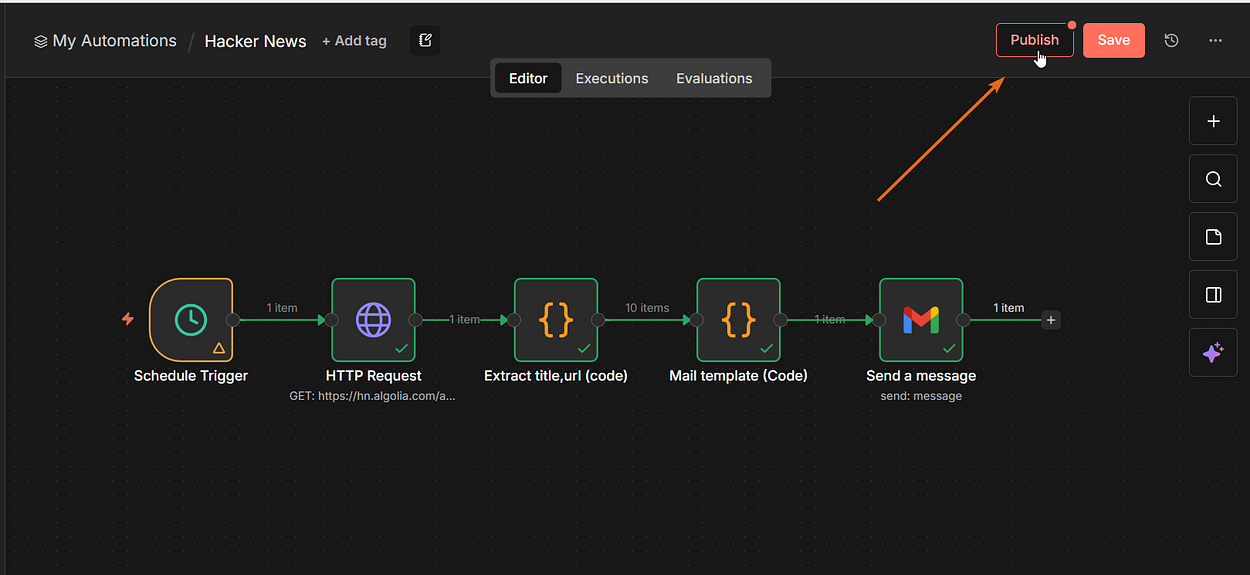
Publish the workflow by using the button in the top right corner.
It operates according to the preset schedule and notifications are received.
🔸Credentials are safe and are kept in encrypted form.
🔸Logs history — view previous runs.
🔸Manual override — perform at any time.
Getting back your freedom is one schedule to set.
👁️Monitoring and Verifying
Hit the Publish button and the workflow will come to life.
The executions tab displays the different runs: the successful ones in green and the ones with errors in red.
Pin the outputs so that you can check them easily.
You can always adjust it — turn it off, change it, and turn it back on again.
Your initial automation works smoothly.
- Insight into the past — trace bugs back.
- Alerts for errors — keep in the forefront.
- Export JSON — either to share or to keep an extra copy.
Did you experience the grind? n8n has just removed it. Cloud installation, put a schedule and HTTP, execute — see it functioning. Your first workflow is up and running, as well as the freedom.
Cubed
Write about the technologies shaping the future.
For developers, founders, and curious minds exploring AI, crypto, Web3, and emerging tech—signal over noise.
One free account across In Plain English, Stackademic, Venture, and Cubed.
How it works- AI, crypto & Web3
- Software & emerging technologies
- Analysis & practical resources
- Thoughtful voices, not hype
Sign in
Google or GitHub
Complete profile
Takes a few minutes
Get approved & publish
Start sharing
Why write for Cubed?
The future deserves thoughtful voices, not just louder headlines.
Comments
Loading comments…