
Hi everyone. Today, we will delve deeply into the process of building an AI chatbot with Cute Edge LLMs. The Gemini API will be utilized in our use case.
Let’s get started by following those steps together to successfully build our AI chatbot.
- Retrieve Gemini API
- Retrieve Whatsapp API
- Set up flask code and deploy it in Heroku
- Set up webhook
1. Retrieving Gemini API.
We need this API, so we can make a post HTTP request to Gemini LLM.
Go to AI Google then click on Get API, you will notice a new page, at the left of the page click on Get API Key, after that make sure to copy and past the keys in somewhere safe.
That’s all, by the way the keys are free until now, with 60 QPM (queries per minute), but you need to consider that Input and output data shared with Google.
2. Retrieving Whatsapp API
Firstly, go to Facebook developer then create an app their, by clicking on “Create APP”. In our app we need to create a chatbot on Whatsapp, so make sure to click on “other”

After that choose the app type, which is “Business”

Then write your app name plus your mail.

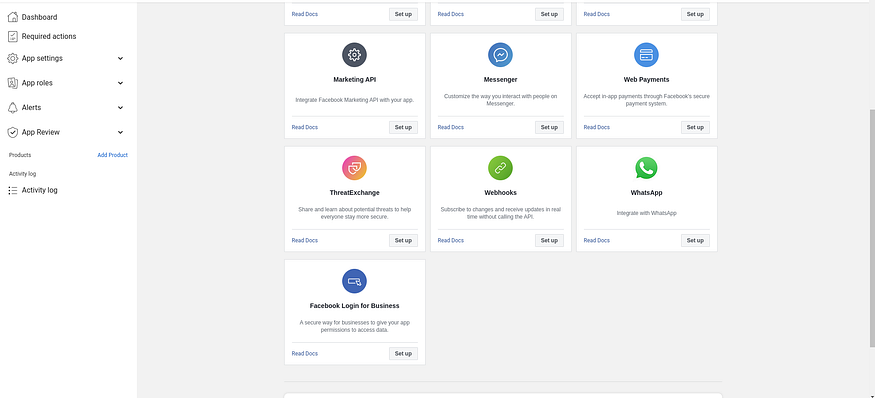
and then scroll down, you will see an icon for Whatsapp, click on it to successfully come to this page below.
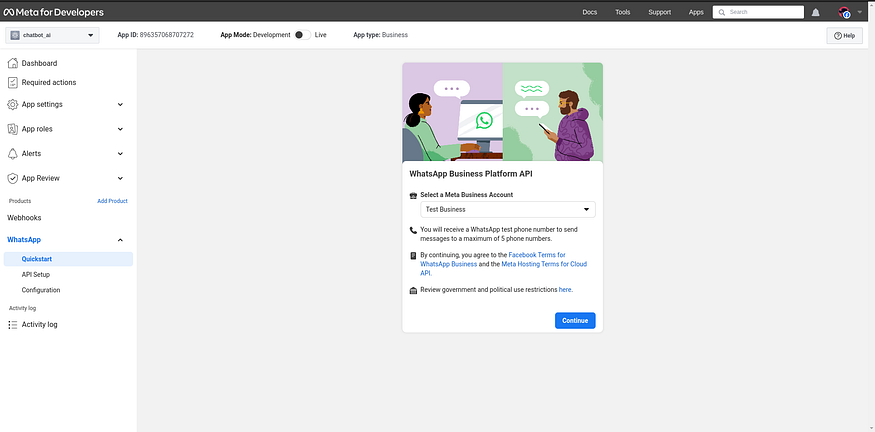
choose your meta account business and click “continue”. You’ll get on the page that appears on the screen below.
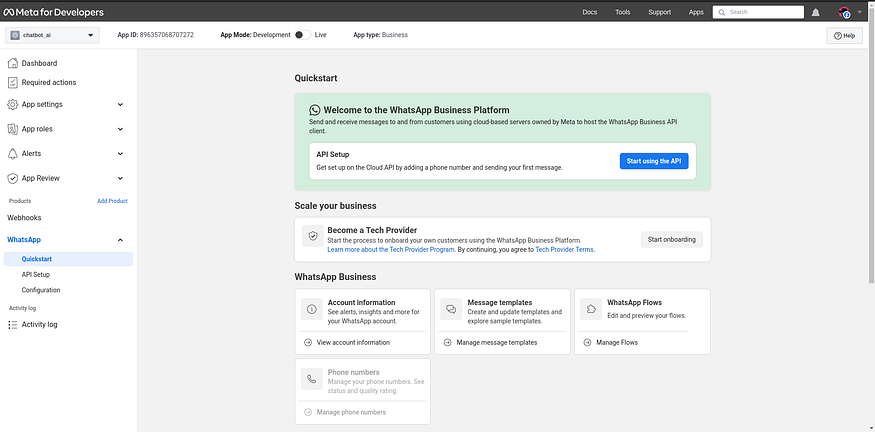
click on “start using API”, and finally you will have the access to retrieve your API keys plus a test number, for now we are going to use only the number whatsapp which will be the AI ‘Sender’, plus your phone number which will be the ‘Receiver’.
Copy the temporary access token and put it somewhere safe, we will use it later , let’s jump to the next step.
You will see Step 2: Send messages with the API, click on “Send Message” button to test that you can receive a message from the test phone number, since in that chat where you will communicate with the AI.
3. Set up Flask code and deploy it in Heroku.
I put the code for this article in this github repository. After cloning it to your own environment, make a new file named .env and add the API Keys listed below.
VERIFY_TOKEN= create a random token or string
GEMINI_API_KEY= GEMINI API kEY
WHAT_TOKEN= the temporary access token from meta
PHONE_NUMBER= your_phone_number
Install dependencies:
pip install -r requirements.txt
The code below explains how the bot will operate. First, it will use the GET method, which is used by the Meta server to ping our URL Callback in order to confirm webhook connectivity. Next, it will use the POST request method, which will be called whenever a user sends a message to our WhatsApp chatbot (i.e., a POST request), Then the function ai_response will cause the GEMINI LLM to generate a response.
from flask import Flask, jsonify, request, Response

import os

import requests

from dotenv import load_dotenv

import google.generativeai as genai

load_dotenv()

app = Flask(__name__)

GEMINI_API_KEY = os.getenv("GEMINI_API_KEY")

WHAT_TOKEN = os.getenv("WHAT_TOKEN")

VERIFY_TOKEN = os.getenv("VERIFY_TOKEN")

PHONE_NUMBER = os.getenv("PHONE_NUMBER")

genai.configure(api_key=GEMINI_API_KEY)

model = genai.GenerativeModel('gemini-pro')

def ai_response(ask):

response = model.generate_content(

ask,

generation_config=genai.types.GenerationConfig(

temperature=0.7)

)

return response.text

@app.route('/',methods=['GET',"POST"])

def hello_world():

if request.method == 'GET':

mode = request.args.get('hub.mode')

verify_token = request.args.get('hub.verify_token')

challenge = request.args.get('hub.challenge')

if mode and verify_token:

if mode == 'subscribe' and verify_token == VERIFY_TOKEN:

return Response(challenge,200)

else:

return Response("",403)

else:

return

if request.method == 'POST':

body = request.get_json()

if body["entry"][0]["changes"][0]['value']["messages"][0]["from"] == PHONE_NUMBER :

user_question = body["entry"][0]["changes"][0]['value']["messages"][0]["text"]["body"]

response = ai_response(user_question)

url = "https://graph.facebook.com/v18.0/115446774859882/messages"

headers = {

f"Authorization": f"Bearer {WHAT_TOKEN}",

"Content-Type": "application/json"

}

data = {

"messaging_product": "whatsapp",

"to": PHONE_NUMBER,

"type": "text",

"text": {"body": response}

}

response = requests.post(url, json=data, headers=headers)

print(response.text)

return Response(body, 200)

if __name__ == '__main__':

app.run(host='0.0.0.0',port=os.environ.get("PORT", 5000))
Then go to heroku and create a new app, it will not take too long, just log in or create a new a account if you don’t have one, then you will see create new app at the top right of the page.
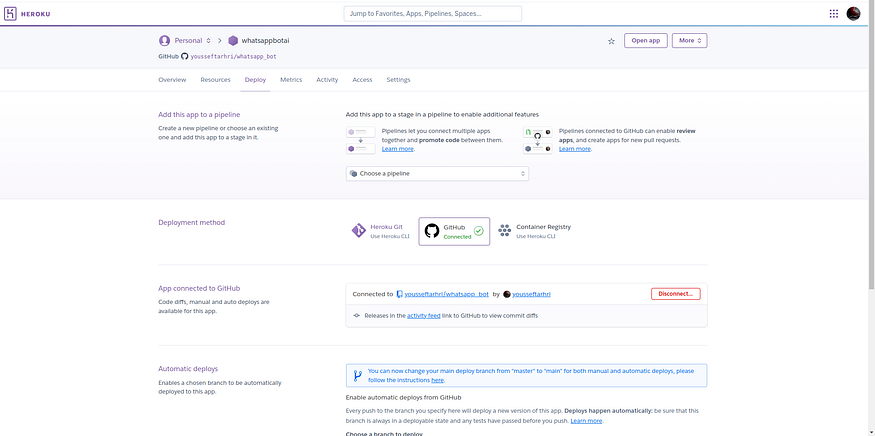
Then go to Deploy section and choose your github repository (The code that you cloned before push it in a new repository), and since we are not pushing .env file to the repository, we need to create our own config file in Heroku, so click on Settings, then you will notice config vars as shown in the screen shot bellow. Copy all your API keys in that section.
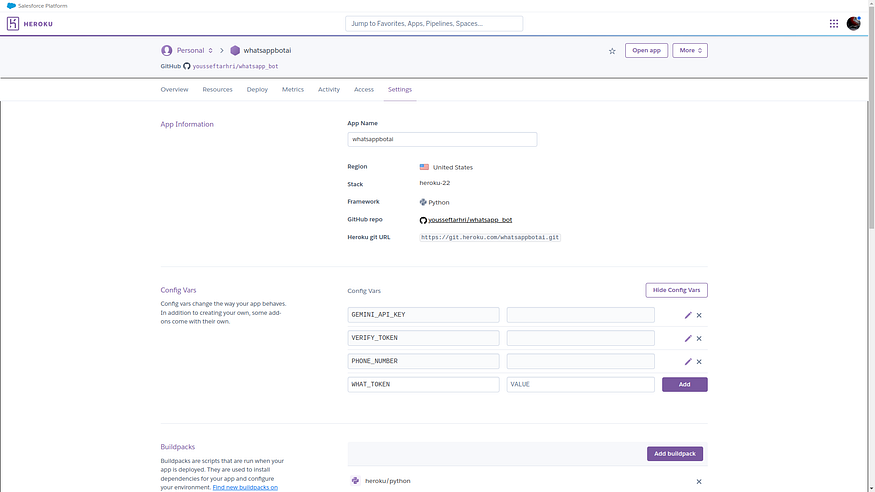
Note you will need the domain name, you can access it in the Settings section, then scroll down you will see the domain name.
After finishing the deployment, you need to setup webhook.
3. Set up webhook
Let’s explain what is webhook used for, webhook typically used to connect two applications, in our case user message and LLM, when an event occur, which mean when someone send a message in whatsapp, this data will be sent to the webhook URL, then we gonna take this data and pass it to the LLM, the LLM gonna return the response based of the user input, and finally we gonna send the AI response back to the user.
After you created your app, you will be directed to this page.
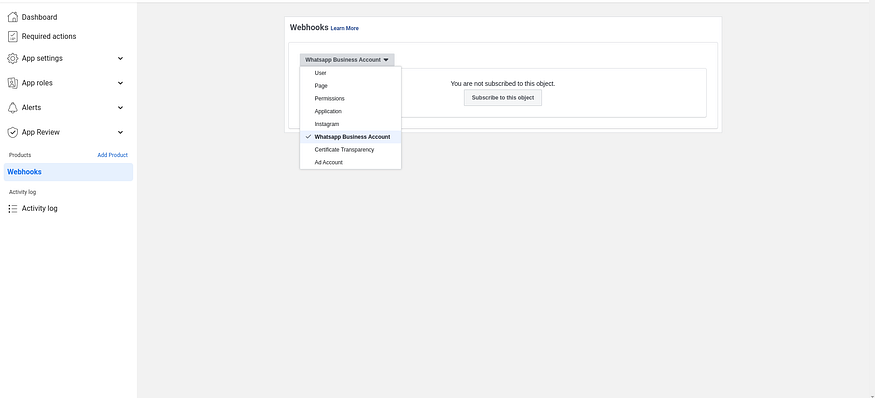
Then click on setup for Webhooks, then choose Whatsapp Business Account, since here we are creating Whatsapp Bot, then click on Subscribe to this object.
After that we need to enter both Callback URL and Verify Token. Copy and past the domain name that you get from Heroku, and the verify token that you generated before.

Callback technically is a ping http or https request between one sever and another the pings occurs when an event happen, for example in our case whatsapp going to ping our URL Callback with the data when someone send a message in whatsapp chat.
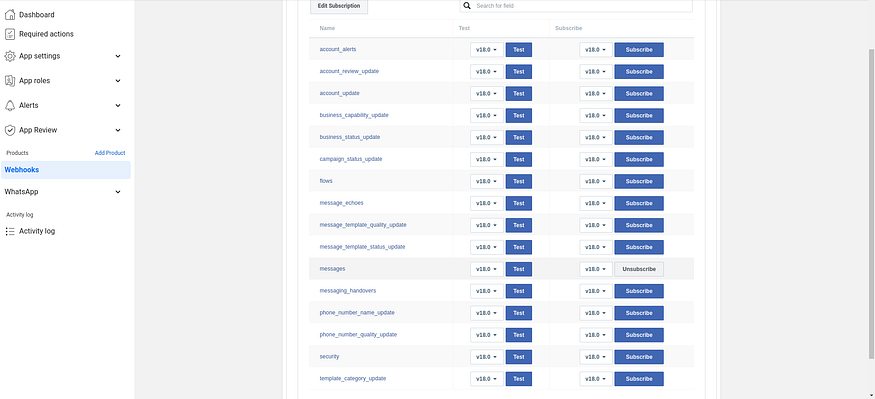
Finally subscribe to messages object, here as you can see in the screenshot, each row or field map to a given event. For example messages field will be trrigered when a user send a message in our chatbot.
Congratulations, open WhatsApp Chat, try sending a message, and the AI will reply. In order to ensure that we can access this LLM in WhatsApp chat, the AI is not currently remembering previous conversations. However, you can tweak the code to add more features, such as storing chat history to help the AI recall previous conversations, and you can work on prompt engineering to improve the accuracy of your chatbot.
More in chatgpt

Cubed
Write about the technologies shaping the future.
For developers, founders, and curious minds exploring AI, crypto, Web3, and emerging tech—signal over noise.
One free account across In Plain English, Stackademic, Venture, and Cubed.
How it works- AI, crypto & Web3
- Software & emerging technologies
- Analysis & practical resources
- Thoughtful voices, not hype
Sign in
Google or GitHub
Complete profile
Takes a few minutes
Get approved & publish
Start sharing
Why write for Cubed?
The future deserves thoughtful voices, not just louder headlines.


Comments
Loading comments…